Tropical Fish Keeping banner

67 gallon tank project

1 reading
10K views 33 replies 11 participants last post by  SinCrisis  
#1 ·
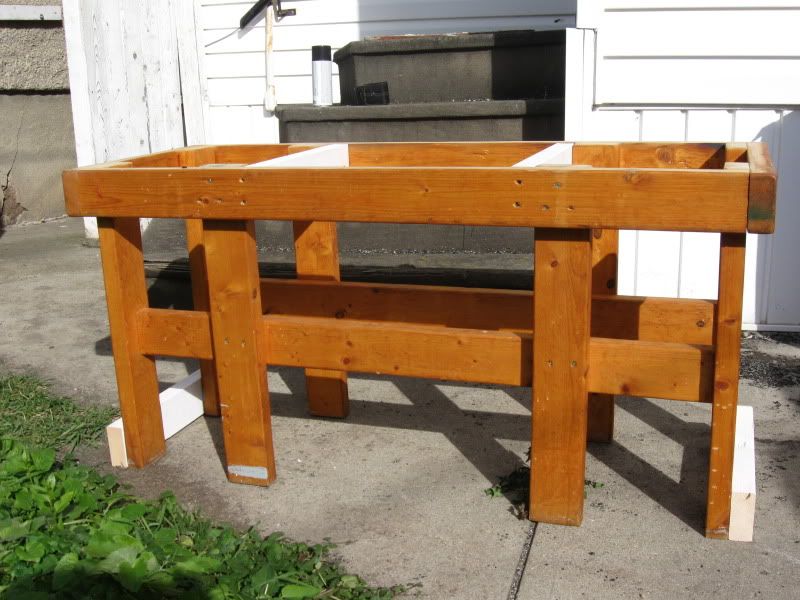
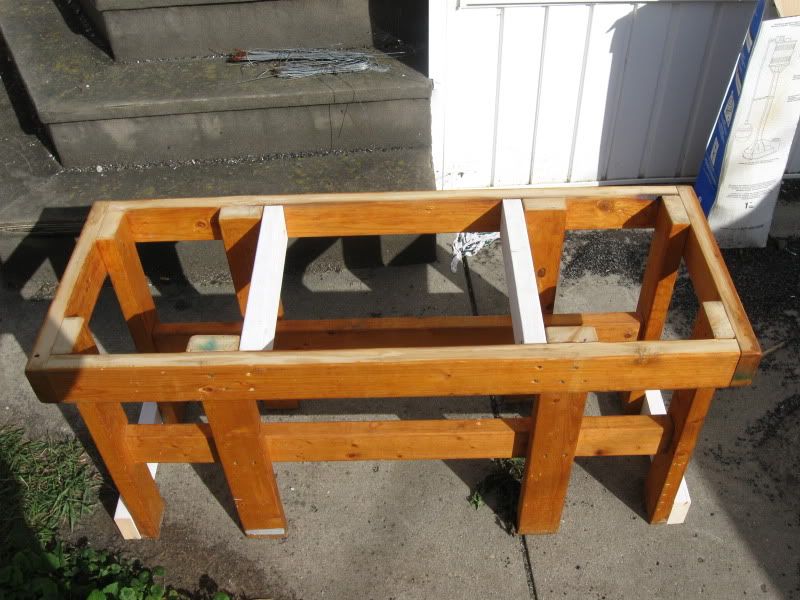
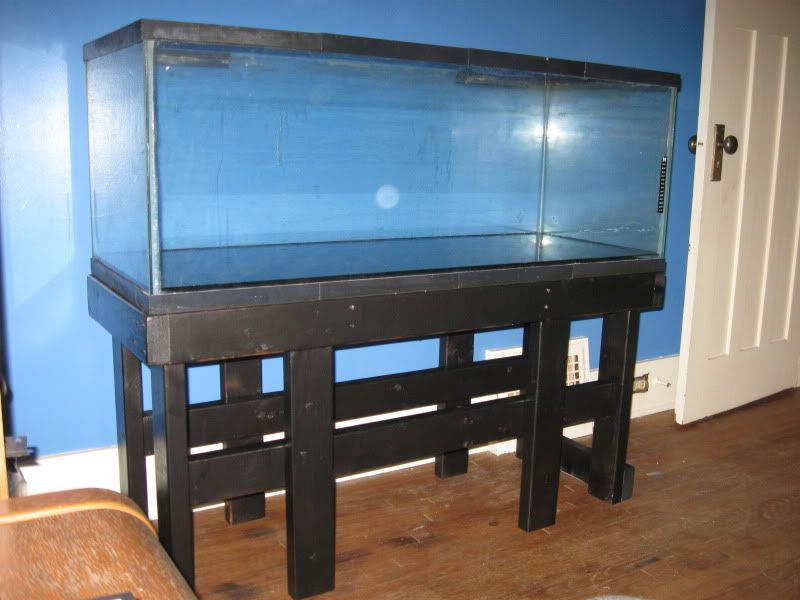
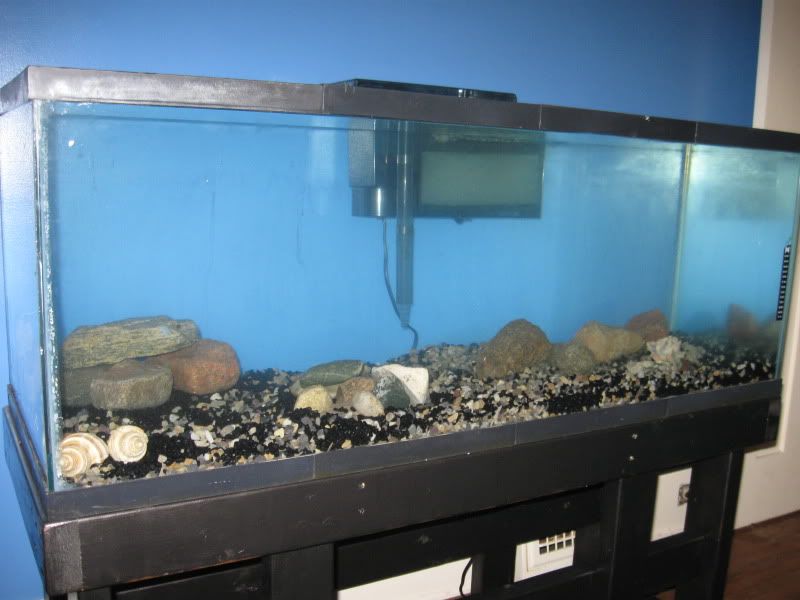
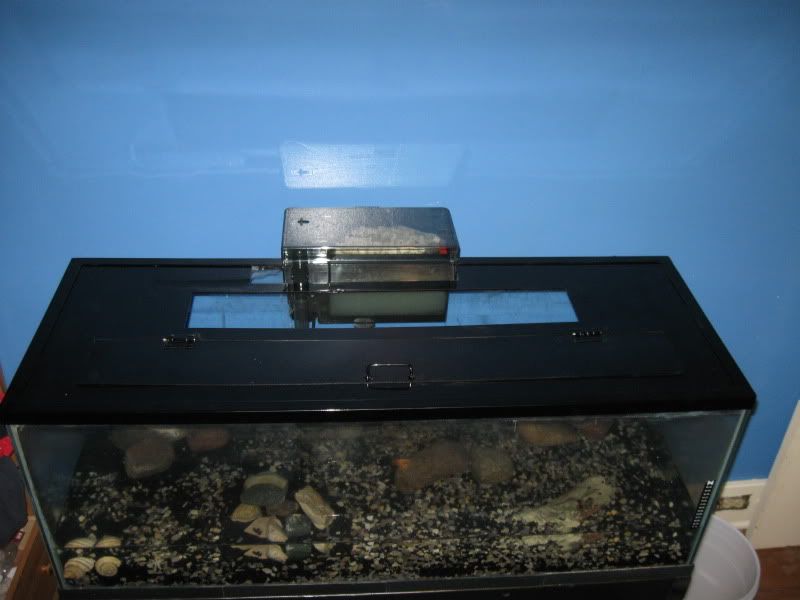
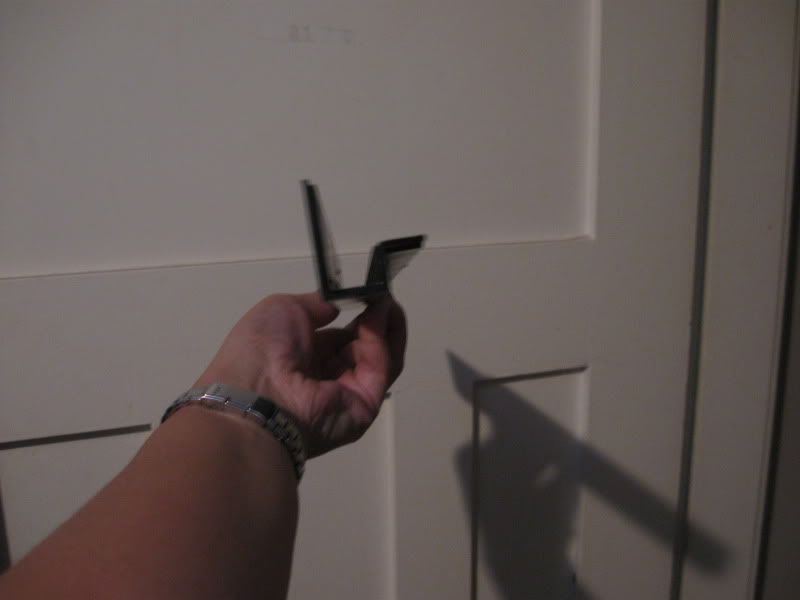
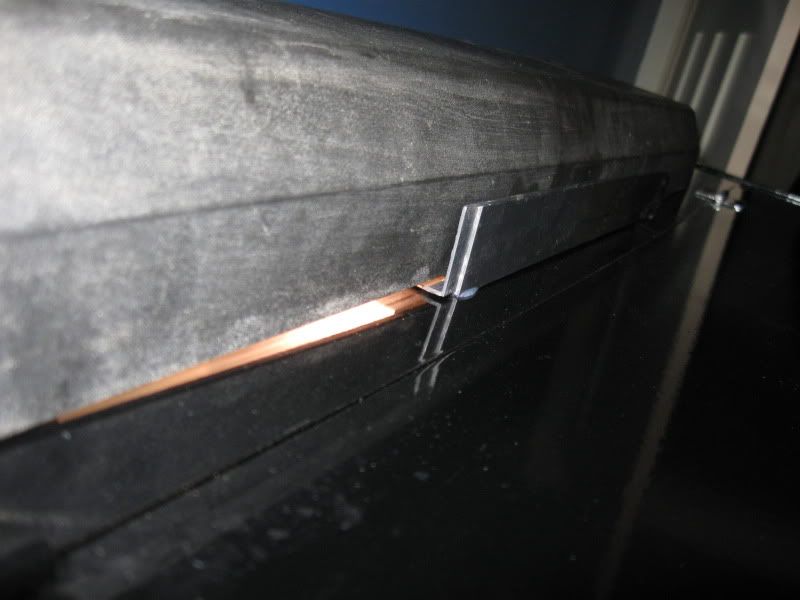
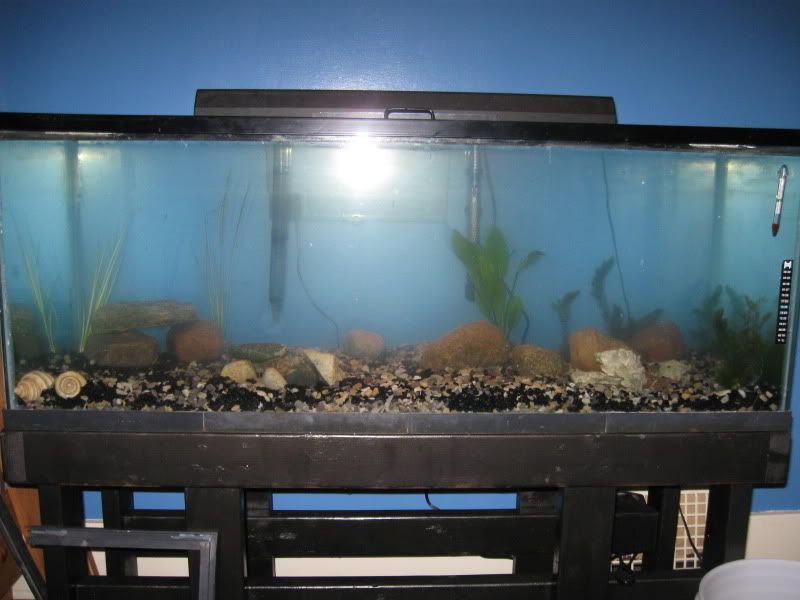
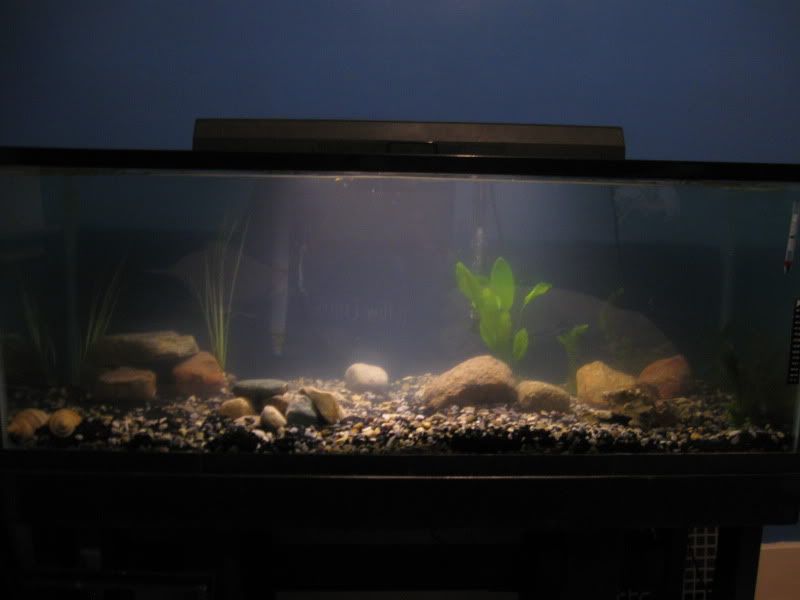
Ok. So I picked up this tank yesterday and it is going to be a lot of work... I am really looking forward to it and at the same time regretting my choice to buy this tank... but it'll be worth it in the end. This is the original picture provided by the seller. My one friend and I had to carry it up from the seller's basement... did it with all of those rocks inside which was a huge mistake. I thought my fingers were going to fall off! My legs are covered in bruises from when we had to stop and rest it on our legs every so often... suffice to say it was a lot easier getting it into my house from the back of my car because that time, I made the multiple trips to carry buckets of rocks inside before attempting to lift it again! First step is to get it all cleaned... then I'll start thinking of lid designs and how to make the stand more attractive and stable, and all that fun stuff.
 

Attachments

#3 ·
looks like a lot of scrubbing =S
 
#6 ·
It was a great deal, definitely worth the work so far. I am thinking of stocking it with rasboras (I'm thinking harlequin, I have them in my smaller office tank and I really like them - had a couple other kinds suggested in another thread, checked them out, but still like the harlequins best). I would also like cardinal tetras and a few angelfish. I'm trying to decide whether I should add an additional type of fish, or if I would prefer to increase the number of rasboras and tetras. I've thought about a few different fish, and african dwarf frogs, but all of the other ones that I've thought about and plugged in to aqadvisor have come up with issues/incompatibility.

i got the tank scrubbed out... will post pics when I can get some decent ones. I took a bunch of pictures periodically throughout the scrubbing process, but the pictures of the tank once I got it (almost) completely cleaned turned out fuzzy.

I've got the leak test started... I looked online for different methods and found a bunch that suggested filling it in increments over a period of a few days so that's what I've started doing...I am slightly concerned about the seams along the top (starting from the top, and extending about 1/5 of the way down) because the silicone feels a little harder to the touch, but so far the tank is half full and no leaks yet.

and... I don't think I'm ready for saltwater just yet...
 
#7 ·
the stand has now been reinforced with some extra 2x4 muscle. There were some creaks that made me uncomfortable, and I also added supports across the middle in a couple spots. I also painted it shiny black. The leak test was ended prematurely due to the tank needing to be emptied and moved from where it was for awhile, so I'll do the complete check this weekend. Feels like this is taking forever from when I started, but really... it hasn't even been 2 weeks yet. Not too shabby progress when I think of the fact that I work full time and go to school at night. I'll pick up gravel on my lunch hour today, and a new filter... The one that came with the tank is missing some hoses, and for multiple different reasons I've decided on a filter that hangs on the side rather than a canister. So... tank will be cycling by the weekend. w00t!

Couple more pics to show how the setup is looking so far... the white 2x4's are the ones I added.

Image


Image


Image
 
#10 ·
thanks, bear!

And yeah, the stand is pretty... um... rugged. I was paranoid because it creaked a bit, and I have a German Shepherd that chases our cat around and they run into things... so I thought, better to overdo it than to run the risk of it coming crashing down!
 
#11 ·
So I've got the tank fully set up now and cycling... put some rocks in it and a piece of driftwood. I plan on adding some live plants, and maybe some more driftwood... I'm trying to think of something to fill the tank vertically but the decorations I've seen in the stores around here are all too ugly and waaaaaaaaay too expensive so hopefully I can satisfy that desire with the plants that I choose.

Image


I am a bit worried because I noticed that the long sides are bowing a little bit. In a tank this large, is it normal to have some bowing? Should I drain it and do something to prevent that bowing?
 
#13 ·
looks really cool so far. Lots of work thus far, I bet. I can't wait to see it planted and with fish. What are the dimensions of this tank? IT looks similar to one of my tanks.
 
#14 ·
looking good
 
#15 · (Edited)
It has been a ton of work so far, but for some sick reason I'm enjoying every minute of it!

Amazon sword looks nice, i'll keep it in mind. I think i'm gonna keep the background pretty plain... maybe just some solid dark green.

Dimensions are 48"x18"x18".

Today's progress - had a friend at work weld me a frame for the top to take care of the bowing. So I drained most of the water out so I could see if the top fits... scraped all the old silicone off from the old crappy frame (it was just a bunch of plastic pieces put together, so really no structural support whatsoever... purely aesthetic). tested the fit of the new top... and it's a smidge tight. I'll have to take it back to work and file inside the corners a bit, and then it'll fit like a glove... so then the next step will be to weld a brace across the middle, then blast it and powdercoat paint it.

on friday I designed a canopy to sit on top... sent it to the laser to get cut over the weekend... just a really simple one but it'll look really sharp once it's blasted and powdercoated as well. Gah... it's getting so close to being done. I cannot wait. Man... thinking about the metal work is making me feel really lucky to work where I work. :)
 
#16 ·
look like a lot of diy this should be interesting =)
 
#19 ·
Is there a brace? For large thanks most have a brace to help support the glass.
The newly built frame is made out of 1/8" thick angle iron. The canopy that I designed ended up being welded directly to the frame due to a miscommunication/bad foresight on my part, so it's all one solid piece. (I'm a bit unsettled by the idea of "what if I have to take the whole lid off for some reason?" but I think the hinged opening as well as the large hole that the light will sit on will give me enough access that HOPEFULLY I'll never have to worry about that...).

Lid should be ready to paint today, so hopefully I can post pics of the final tank setup this weekend.
 
#20 ·
Pic with the lid on... I tried to get the best angle that I could, but the tank is very large, and I'm pretty short so I was standing on something and holding the camera over my head pointing down and just praying that I got most ofthe lid in there...

Image


As of today, the tank is now filled with water, cycling once again... I will be adding one last detail to the lid - the big hole that you currently see is where the light will sit. Long annoying story about the sheet getting welded upside down into the frame, and something getting spliced in the wrong spot resulted in the gap ending up smack dab in the middle of the tank rather than off to the side as I originally designed it... but I'm being too critical I think. In any case, I'm not comfortable with the fact that the cord runs very close to the water coming out of the filter, so I am going to make something for the light to sit in that provides a waterproof barrier between it and that filter.

so. this picture is sans light for now (taken yesterday, so not filled with water yet). I hope to pick up some plants and also have that frame/barrier for the light completed on friday.
 
#22 ·
So, here is my idea for the light. when I first picked up the tank, it had this yucky plastic frame on top that was a bunch of pieces of plastic. I am going to make use of it. I'm gonna flip it upside down (like how i'm holding it in the picture) and silicone it to the lid to make a sort of shelf for the light to sit on. The cord can run along inside the gap, safely tucked away from the water. I'll get a piece of plexiglass cut that'll slide underneath the plastic - I want the plexiglass to be easily removed since I can never take the whole lid off and as such, would like to keep that big hole there (but coverable) for easier access. I hope my description of it makes sense... if not, just wait for pictures. :)

Image
 
#23 · (Edited)
Done! Tried to get a picture of what I did to get the light on there... it's hard to get a photo of the back, which is where the safety concern was... so I took a picture of the front instead. It's the same thing in the back, except the cord is there... covered under electrical tape and tucked inside the plastic frame and taped some more.

Image


Also got some plants in the tank now. Here's a picture where I left my flash on...

Image


And one with the flash off...

Image


So, I would say this project is complete! well... other than the fact i have to put fish in there. And I will add more plants as I add more fish. I don't plan on adding a background... there isn't a whole lot going on outside the tank at the back, and I think once it's heavily planted enough, nobody will notice a thing. I would have chosen a blue background, and with our bedroom walls as blue as they are... it'd be a waste of money. :)
 
#24 ·
Well done, looks very nice :). What lights are you using? will it be sufficient for the plants? and youre using a hang on filter? how big is the filter? sorry for asking all this questions but im planning on setting up a 4 ft (48"x24"x18"). i know it will be a bit bigger, but just to get an idea :)
 
#25 ·
thanks, pikkie! I honestly have no idea what kind of light it is... it says "aquarium & plant" on it, but that's all I know. It's just the one that came with the tank, which was bought used. Hopefully it will be enough for the plants... if I notice that they're not doing as well as they should be, I'll pick up a brighter light. the plants I bought were marked as "moderate" as far as light requirements, and I think I'm going to move them away from the corners and more toward the centre of the tank and put some rocks in the corners instead just to make sure the plants get as much light as possible. The filter is an aquaclear 110.
 
#27 ·
Thanks! I liked the way it looked, too... it was more pronounced due to the water being a bit cloudy (bacterial bloom maybe?). I did a water change last night and it's crystal clear now. It's still a bit brighter in the centre of the tank just due to the length of the light, but the effect isn't nearly so dramatic.

I put 5 neons in on sunday... i knew the tank wasn't (and still isn't) fully cycled yet, but figured... it's such a large tank and they're so small, plus there are some plants in there so ammonia shouldn't be too much of an issue. I could be wrong... but i'm testing for ammonia daily and will do the necessary water changes.
 
#28 ·
So the tank is pretty well stocked now... I will maybe add a few bottom feeders in a month or so. Neons weren't doing too well for some reason, so I moved the survivors to my office tank which has water parameters that should suit them a bit better.

Now this tank is stocked with:

12 x harlequin rasboras
1 x dwarf gourami
3 x dalmatian mollies
5 x angelfish

I was hoping to add some more pictures before the contest ends, but I forgot my camera at work over the weekend. :(